Pages

Showing posts with label 52weeksofbaking. Show all posts

Monday, August 20, 2012

Raspberry Limoncello Popsicles


I refuse to admit to myself that summer is ending.


It's difficult each year, but usually I become too bored to stay home any longer. 


Unfortunately, summer 2012 hasn't bored me, yet.


As the tan fades, and September approaches, I just have to be honest with myself; it's been a good break. 


There really isn't anything else I can do but sit back, (maybe in a hammock), put my feet up, and have a popsicle.


Raspberry Limoncello Popsicles
(makes 4 medium-large popsicles)
adapted from Everyday Food

Ingredients
1/2 pound fresh raspberries
3 oz. simple syrup
1 oz. plus 1 tablespoon limoncello
2 tablespoons lime juice

Directions
In a medium bowl, mash the raspberries. Add the simple syrup, limoncello, and lime juice to mashed berries. Stir until well combined. Pour into popsicle molds and freeze at least 4 hours, or until completely frozen. 

Wednesday, August 15, 2012

Chicken Empanadas


Empanadas make me think of Pepsi. I don't even drink Pepsi.

Well, my mom used to be a huge Pepsi fan. So, growing up, I was a Pro-Pepsi, loved the sweetness, hated the way the Coke carbonation felt. It didn't seem to go down as smooth, in my mind. Over time, mom started buying less Pepsi, and then my school's dining hall was serviced by Coke. I was introduced to Coke Zero and I've converted. I've crossed-over. I'm a coke girl, now.


So, why do empanadas remind me of Pepsi? Not too long ago, Pepsi's ad campaign (perhaps specific to the Spanish channels) featured a commercial where a boy is at a party and tries to bite into a tamal without removing the husk. He then, after meeting a pretty girl and drinking some Pepsi, learns how to properly eat one. Maybe they dance, maybe they fall in love, who knows, it's a really short ad. At the end, he's about to chow down on an empanada, but he's no fool, he's not to be tricked again by foreign foods. He tries to "open" the pastry shell before digging in. Leaving the girl hopelessly shaking her head at him.

I didn't grow up eating empanadas, even though I'd hear about them constantly. Week 28 of the baking challenge was to make a South American food, and I was in the mood to bake something savory.


While I may not have chosen the most traditional of recipes, I did pick one that featured ingredients I could easily get a hold of. The prep was relatively easy.

Once baked, the empanadas seemed to lack sauce, so I would definitely serve them with salsa. I wouldn't adjust the filling recipe, as there was plenty to go around. Maybe even too much, (which wasn't a problem for me, as I just turned the rest of the filling into chimichangas).


Chicken Empanadas
slightly adapted from FoodNetwork

Ingredients
3 cups cooked chicken, cut into small cubes
4 oz. Colby cheese, shredded
4 oz. Pepper Jack cheese, shredded
4 oz. cream cheese, softened
1/2 red bell pepper, chopped
1 jalapeno, seeded, deveined and chopped
1 tablespoon cumin
1 1/2 teaspoons salt
1/2 teaspoon pepper
1 (15 oz) package of refrigerated pie crusts
1 large egg
water


Directions
Preheat oven to 400 degrees Fahrenheit. Line a baking sheet with parchment paper.

In a large bowl, combine the chopped chicken with the cream cheese, shredded cheese, chopped bell pepper, jalapeno, and spices. Mix well.


On a lightly floured surface, unroll one of the pie crusts. Cut out rounds, using a 3" cookie cutter. (I found I could get 8 circles out of a pie crust before re-rolling). Repeat procedure with 2nd pie crust, and roll scraps together to cut out more 3" circles. Arrange circles on the prepared baking sheet.

Place a heaping teaspoon of the chicken mixture onto each 3" circle.


Dip your finger into the water and trace the edges of the dough circle. Fold dough over, and seal shut with the tines of a fork. Repeat with the remaining circles of dough and chicken mixture. (At this point, the empanadas can now be frozen for up to a month.)


Beat the large egg and brush the tops of the empanadas with the egg wash. Bake on the prepared sheet, (I could fit 8 at a time), for 15 minutes, turning the pan around halfway through.

Serve with your favorite salsa, and, if you're looking to eat them as a meal, a side of rice and beans.

Monday, August 13, 2012

Raspberry Streusel Tart


Summertime is berry time. Summertime is also "I can't possibly turn on the oven in this heat" time. As I was living in an apartment without air conditioning, you can see how this could be a problem. I wish I could tell you there was an easy solution, but there isn't. So, what did I do? I moved. Plain and simple. Up and left my apartment, and moved into one that allowed me to bake in the middle of a heat wave.


Sure, I'm going to end up paying for it in the electric bill, but until I see my first invoice, I'm going to go ahead and say it's been worth it. This tart, topped with a dollop of whipped cream, worth it. Not to mention the smells that take over your home as it bakes. I'm obsessed with baking smells. This one is top notch.


Raspberry Streusel Tart
from The Joy of Cooking
makes one 9 1/2" - 10" tart, serves 8

Ingredients
(shortbread crust)
1 1/4 cups all-purpose flour
1/3 cup sugar
1 teaspoon grated lemon zest
1/4 teaspoon salt
8 tablespoons unsalted butter, softened
2 large egg yolks, divided

(streusel)
2/3 cup all-purpose flour
2/3 cup chopped walnuts
1/3 cup sugar
1/3 cup brown sugar
5 tablespoons unsalted butter, melted
1 teaspoon ground cinnamon
1/4 teaspoon salt

(filling)
3 cups raspberries
1/2 cup sugar
2 tablespoons cornstarch
1 tablespoon fresh lemon juice

Directions
(Shortbread crust)
In a medium bowl, whisk together the flour, sugar, lemon zest and salt. Add the softened butter and mash into the flour mixture with the back of a fork, or the bottom of a whisk. Mash until the mixture resembles course crumbs. Add one large egg yolk and mix together with a spatula, pressing dry bits into the dough to incorporate. Mix until dough comes together in a ball. Cover in plastic wrap and refrigerate for at least 30 minutes, (up to 2 days).

(Streusel)
In a small bowl, whisk together the flour, sugars, walnuts, cinnamon and salt. Add dry mixture to melted butter and blend well. Mixture will also resemble course crumbs. Set aside.

(Filling)
In a medium bowl, stir together the raspberries, sugar, cornstarch and lemon juice until just combined.

Assembling the tart
Preheat oven to 400 degrees Fahrenheit. Grease the bottom of the pie pan, dusting with flour. Pat the shortbread dough evenly over the bottom and sides of the prepared pan. Using the tines of a fork, poke holes throughout the bottom and the sides of the soon-to-be tart crust.


Bake until deep golden brown, (18 - 22 minutes).

Whisk together the remaining egg yolk with a pinch of salt. Brush the inside of the shortbread crust with the yolk. Return crust to oven until egg glaze sets, (1 - 2 minutes). Let cool completely.


Preheat oven to 350 degrees Fahrenheit. Distribute raspberry mixture evenly in tart crust. Sprinkle streusel over the berries and bake the tart until the streusel has browned and thick juices bubble up near the center, (45 - 60 minutes). Let cool completely on rack. Best served the day it is made.


Friday, August 10, 2012

Chocolate Chip Challah


Baking bread can seem daunting to people. There's yeast, kneading (or not), and multiple risings. These are steps in the baking process that aren't routine to us cookie/cupcake/whoopie pie-makers.


Yet, what most of us don't realize, is that the rewards of bread-making are so fan-freakin-tastic. The smells, the taste, the texture. All worth it.


For week 30 of the baking challenge I was to make a sweet bread, and since I had been invited to a friend's house for a Shabbat dinner, the timing couldn't have been better. I had made the recipe before but my braiding turned out pretty wonky. This time, I decided to go for a three-strand braid, under the direction of this site. Braid, brush, rise for an hour.


Brush the loaves again with a second egg coating, then enjoy the next 30 - 45 minutes as the smell of challah dances through your home.


Chocolate Chip Challah
Adapted from Smitten Kitchen
makes 2 loaves

Ingredients
1 1/2 packages active yeast (about 11 grams)
1/2 cup plus 1 tablespoon of sugar (113 grams)
1/2 cup vegetable oil
4 large eggs
1 tablespoon salt
8 cups all purpose flour
1/2 cup chocolate chips, (per challah), optional
1 large egg (for coating)

Directions
In a large mixing bowl, dissolve yeast and sugar in 1 3/4 cups of warm water. Whisk together with vegetable oil until well combined.

Beat in each of the 4 eggs, individually. Stir in salt. Add flour, one cup at a time, stirring between each addition. When dough starts to form a ball, (albeit scraggly), turn dough onto floured surface and knead until smooth. (Make sure to incorporate all the flour bits that may have stuck to the edge of the mixing bowl.)

Spray bowl with cooking spray, and return dough to mixing bowl. Cover with plastic wrap and let it rise for at least an hour.

When dough has just about doubled in size, punch it down. Roll the dough over, so that the top of the ball becomes coated in the cooking spray. Cover again with plastic wrap, and let it rise in the refrigerator overnight. (Can't wait? Replace the chilled overnight rise with a 30 minute warm rise).

Remove bowl from fridge, bring the dough back to room temperature. (About 30 minutes). Knead the chocolate chips into the challah dough. Separate dough into two portions, (for the separate loaves).

Take each dough portion, and divide into 3 equal sized dough balls. (These will become your braid-strands). Roll each small dough ball into a long dough strand, about 12 - 15 inches long, (use the long edge of your baking sheet for comparison). Place the three strands side-by-side, parallel to one another, and about halfway down from the top, begin a 3-strand braid. Braid the strands together until you've reached the bottom, then flip the entire braid over so that you can braid the unfinished portion.

Once you have a braided loaf, place it on a greased baking sheet, making sure to leave plenty of room for challah #2. (Leaving a 2-inch gap between loaves). Repeat braid process for the remaining half of dough. Beat the final egg and coat the braided loaves with the egg wash. Cover with greased plastic wrap and let braids rise for an hour.

Preheat oven to 375 degrees Fahrenheit. Brush loaves again with egg wash. Bake in the middle rack for 30 - 40 minutes, or until golden brown and the internal temperature reaches 190 degrees Fahrenheit. Cool challah on racks before serving.


Thursday, August 2, 2012

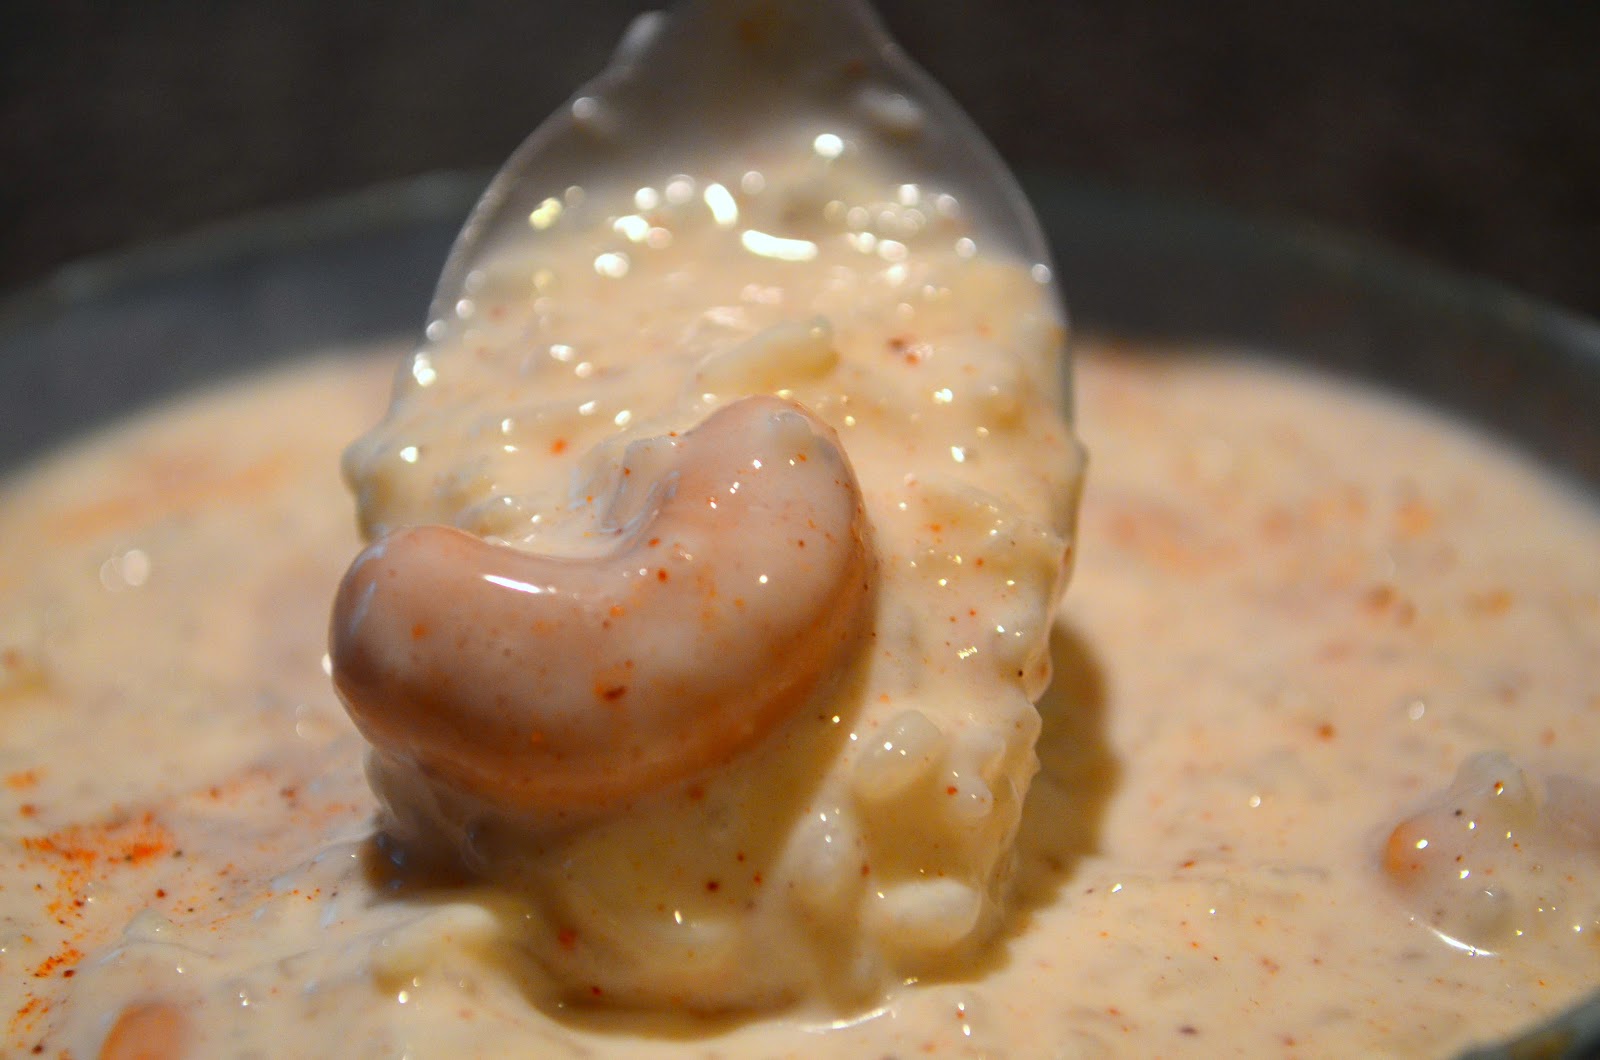
Rice Pudding with Coconut Milk and Cashews


A while back, my friend and I were in New York and found ourselves visiting a gelato shop in Chelsea Market. The display case was so tempting, we just couldn't resist. The only problem was that the flavor names were in Italian.

Normally, I have no problem asking people questions, but when it comes to gelato, I knew I'd ask a TON of questions. Seeing as how it was very busy that day, I panicked and picked a flavor at random.

The gelato was creamy and delicious, the flavor so difficult to identify. It couldn't have been vanilla, and there were these small pieces of unidentifiable solid....grains of rice?

Then it clicked. Rice pudding gelato. And it was amazing.


Week 26 of the challenge requires a gluten free recipe, which got my mind back on rice pudding. A few nights prior, I had made basmati rice, and ended up with leftovers. Luckily, after doing a little research, I realized that most rice pudding recipes have you start by cooking the rice. It was like I was already halfway done!


Since I was using basmati rice, I chose to include coconut milk, and some nice spice combinations. Cashews for texture? Why not.


Rice Pudding with Coconut Milk and Cashews
serves 6
adapted from Alton Brown

Ingredients
2 cups cooked basmati rice
2 cups milk
1 cup heavy cream
1 1/2 cups coconut milk
1/2 cup sugar
1/4 teaspoon cinnamon
1/4 teaspoon nutmeg
2/3 cup whole roasted cashews

Directions
In a large nonstick saucepan, combine the cooked rice and milk over medium-high heat. When the mixture begins to boil, bring the saucepan to a simmer and cook until thickened, stirring often. (About 10 minutes).

Bring the heat back up to medium-high and add the heavy cream, coconut milk, sugar, cinnamon, and nutmeg. Stir frequently and cook until the mixture begins to thicken again, (about 15 - 20 min). Once the mixture starts to thicken, stir in the cashews and remove from heat.

Serve rice pudding in little dishes, top with a light sprinkle of either of the spices. Tastes great hot or cold. (Can be chilled in refrigerator overnight.)

Friday, June 22, 2012

Cinnamon Ribbon Breakfast Cake


Making cupcakes started my love for baking. In order to get people to like me, I decided to regularly supply people in the residence halls with home, er, dorm-baked cupcakes. My beginnings were somewhat rudimentary as I fiddled with an old/uncalibrated oven, measured with individual plastic pudding containers and mixed my batter with a fork. The cupcakes were ridiculously moist, (the box states there is pudding in the mix, and I interpreted it as a suggestion to ADD pudding to the mix...), which made up for the numerous lumps of flour that would end up baked into the finish product.


From there, I started making variations on simple cake mix cupcakes. I'd use the mix batter to create Oreo cupcakes, peanut butter surprise cupcakes, and other recipes from the Cake Mix Doctor, but as I started to follow more baking blogs, I realized I needed to say goodbye to my boxed friends.

Which leads me to this coffee cake. I would always make a breakfast cake by said Dr., but the recipe called for yellow cake mix, and instant pudding mix, blah blah blah. I just knew that there was a better way, and thanks to HowSweetEats, there is!

 *timing is approximate as I let mine bake for an hour and ended up with a slightly over-baked edges and a very dark cinnamon stripe as seen here. When in doubt, start testing with your handy dandy toothpick when the top is golden brown. 

Cinnamon Ribbon Breakfast Cake
Adapted from HowSweetEats

Ingredients
for the cake
1/4 cup chopped walnuts
2 1/2 cups all-purpose flour
3 teaspoons baking powder
1/4 teaspoon salt
1/2 cup unsalted butter, softened
1 1/2 cups sugar
3 large eggs
2 teaspoons vanilla extract
1 cup milk

for the filling
1/3 cup packed dark brown sugar
2 teaspoons cinnamon
1/4 cup chopped walnuts

for the glaze
1 cup powdered sugar
1 1/2 tablespoons milk
1 teaspoon vanilla

Directions
Preheat oven to 350 degrees F.

In a small mixing bowl combine the 1/3 cup brown sugar, 2 teaspoons of cinnamon and the 1/4 cup of chopped walnuts. Set aside. Prepare a bundt pan with nonstick spray, and drop the remaining 1/4 cup of walnuts into the bottom of the pan, (which will then position them at the top of your cake).

In a medium mixing bowl, sift together the 2 1/2 cups of AP flour, 3 teaspoons of baking powder and the 1/4 teaspoon of salt. Whisk to combine and set aside.

In a large mixing bowl, beat the 1/2 cup of softened butter with the 1 1/2 cups of sugar. When the mixture is light and fluffy, add one egg at a time, combining well between each addition. Incorporate the 2 teaspoons of vanilla.

Next, you will add half of the dry ingredients to the sugar mixture. Stir together before adding the cup of milk. Stir again, and add the rest of the dry mixture, combine well.

Pour half of the batter into the prepared bundt pan over the walnuts. Sprinkle the cinnamon sugar filling into the pan forming a layer over the batter. Add the remaining cake batter making sure to spread it out evenly. Bake for 50-55 minutes, turning once halfway through.

Allow the cake to cool in the pan on a wire rack for 20 minutes. Run a knife along the edges to make sure the cake will not stick to the pan as you flip it. Flip onto your desired surface and cool completely before adding glaze.

To prepare the glaze, sift the cup of powdered sugar into a small mixing bowl. Add the milk and whisk together, add the teaspoon of vanilla. Reach desired consistency by adding powdered sugar to thicken or more milk to make the glaze runnier.

Pour glaze over the top of the cooled bundt cake allowing it to drip down the sides.

Monday, June 18, 2012

Rosemary Boule


Before my senior prom, a group of friends and I went to my (then) favorite restaurant, Romano's Macaroni Grill. I loved the paper tablecloths, (and writing on them with crayons), I loved the funky ties on the waiters, (and how they all had mastered the skill of writing their name upside-down), I loved the Italian language tape playing in the bathroom, but most of all I loved their bread.


I went a couple of times as a senior, and a couple more times as I visited home the following year. I dragged friends and coworkers along wanting them to enjoy the experience I had come to love. 


After my sophomore year of college, I didn't go home as often, and thus stopped going to the Macaroni Grill. For some reason, my college friends preferred another similarly themed restaurant...but to me it just wasn't the same.

The following year, I convinced my beau to join me for dinner at the Macaroni Grill, and since his mom's family is Italian he was unimpressed. The food just wasn't as good as it could have been, and since we were cooking up our own delicious pastas, Romano's just couldn't compete. It was clear we wouldn't be going back.

While I don't miss going, I do have moments where memories of the warm delicious bread get in my brain and there's no escaping them. For that, I have created my own version of their Rosemary bread.
 

Rosemary No Knead Bread
makes 1 loaf (about 2 lbs)
adapted from Artisan Bread in Five Minutes a Day

Ingredients

1 1/2 cups of lukewarm water (about 100 degrees F)
3/4 tablespoon granulated yeast (1 packet)
3/4 tablespoon kosher salt
1/2 tablespoon Italian seasoning
1 tablespoon rosemary
3 cups all-purpose flour
1/4 cup bread flour
cornmeal
1 cup of water (for baking)

Directions
Pour 1 1/2 cups of water into a large plastic food container/bowl with a non-airtight lid. Add yeast and salt to water. Add 1/2 tablespoon of Italian seasoning and 1 tablespoon of rosemary to the water mixture.

Measure the 3 cups of AP flour and add it to the container with the water. Add the 1/4 cup of bread flour. Mix with a wooden spoon, or a heavy duty stand mixer with the dough hook, until the mixture is uniform. If scraggly bits of the flour refuse to mix in with the dough, using wet hands, you can press the mixture together. No need to knead.

When the dough has come together, and there aren't any dry patches, you may leave the dough in your container and place the lid on top. Allow the dough to rise at room temperature for about 2 hours.

Once the dough has risen and begun to collapse, prepare a cutting board with a coating of cornmeal. Sprinkle the surface of your dough with flour, and pull up the ball of dough into your hands. While holding the dough ball, add a little more flour to make it easy to handle. Gently form into the shape of a ball by stretching the surface of the dough around to the bottom, rotating, and applying this step to all four sides.

Rest the loaf and let it rise on the prepared cutting board for about 40 minutes.

20 minutes before baking the bread, preheat oven to 450 degrees F, with an upside down baking sheet (or baking stone) on the middle rack. Place an empty broiler tray on the bottom rack.

Dust the top of the dough with flour and slash 3-4 cuts (1/4-inch deep) across the top of your loaf.

Slide the loaf off the cutting board and onto the baking sheet. Pour the cup of water carefully onto the broiler tray and close the oven door. Bake for about 30 minutes, until crust is brown and firm.

Cool completely on a wire rack before cutting and serving.

Thursday, May 17, 2012

Lemon Poppy Seed Muffins


I used to sell a lot of Costco muffins in high school. Each muffin earned us 50 cents in profit. Logically, this was how we decided we were going to fund our prom.


The sales were generally successful, but on one unfortunate occasion, I ended up with a box of non-costco muffins. The problem? They were a box of off brand bran muffins. Nobody wanted bran muffins!


Later in the day, my high school crush was starving. Being the great salesperson that I was, I encouraged him to buy a muffin. He was so stoked to "see" chocolate, and I was so excited about finally landing a sale that I didn't correct him. Sorry, P. 

Well, no confusion here. These lemon poppy seed muffins are sweet, and straightforward. They are exactly what you expect them to be. Delicious with a hint of sunshine. (Or lemon zest, whatevs)


Lemon Poppy Seed Muffins
slightly adapted from Annie's Eats

Ingredients
2 cups AP flour
2 tablespoons poppy seeds
1 1/4 teaspoons baking powder
1/4 teaspoon baking soda
1/2 teaspoon salt
8 tablespoons unsalted butter, softened
1 cup sugar, divided
2 large eggs
zest of 1/2 lemon
1 teaspoon vanilla extract
1 cup plain yogurt

Directions
Preheat oven to 350 degrees. Line muffin tin with paper liners.

Into a medium bowl, sift the 2 cups of flour, 2 tablespoons of poppy seeds, 1 1/4 tsp baking powder, 1/4 tsp baking soda, and the 1/2 tsp of salt. Whisk together to combine.

After reserving two tablespoons for later, pour the remaining sugar into a mixing bowl. Zest half a lemon into the sugar. Use the back of a spoon to press the zest into the sugar. Beat sugar mixture together with softened butter until light and fluffy. Mix in the eggs, one at a time. Add the teaspoon of vanilla and mix well.

Alternating twice with the plain yogurt, add the flour mixture to the wet ingredients. Combine ingredients between each addition.


Divide the batter among the 12 muffin liners, and top the muffins-to-be with the reserved sugar from before. Bake muffins for 18 - 20 minutes, turning the pan once while baking. Let muffins cool in pan for 5 - 10 minutes, before cooling completely on wire rack.

Tuesday, May 8, 2012

The Un-postables!

As I've mentioned before, the recipes I am posting have been part of 2 challenges I am taking part of. Reddit's 52 Weeks of Cooking and 52Weeks of Baking challenge have both encouraged me to post on here somewhat regularly.

Sometimes life keeps me from writing about my kitchen adventures, so I'm going to fill you in on a few recipes that never made it to the blog.

Back in Week 7, when both the cooking and baking challenge were "love-inspired", I introduced you to my love's favorite giant dessert.  What I didn't share with you, was the meal he cooked. A dish that is dear to both our hearts, Mussels with Chorizo, Tomato, and Wine.


Week 9 was both simple, and tricky. The baking challenge asked for a cookie recipe, while the cooking challenge asked that I prepare something with coffee as one of the ingredients. That was the week I took a stab at Joy's Coffee Bacon Sandwich.


The blog missed out on a post again on Week 10, which were recipes inspired by a book, movie, or television. As a passionate Harry Potter fan, I was excited to finally make those Butterbeer Cupcakes. That week, I also made a Giant Chocolate Chip Cookie in honor of this guy


I made something savory for the baking challenge on Week 11. That week, the cooking challenge simply asked for "breakfast", which I made with my BFFFFF out in Northern California. Come to find out, Sausage Breakfast Scrambles aren't the most photogenic dishes....


Week 12 asked that the challengers cook something featuring cheese. After seeing this recipe from How Sweet It Is, I had to make Baked Buffalo Chicken Pasta. On Week 13, I made a no-bake oreo cheesecake, unfortunately, it was all gone before I could take the picture.


Week 16 was a decorating week of the baking challenge: flowers. I never end up fulfilling these, (much like weeks 12 and 4 of the challenge). To be fair, I do try to eventually use the technique. As far as cooking, Week 16 asked for something with asparagus, so I opted for Bacon Asparagus Pizza


Week 17 was a treat for our house. Not only did we cook lemon-peppered salmon for the challenge, (which asked for a recipe from childhood), but I also made a giant twix bar for the baking challenge which required that I make something with layers.


For Week 18, I'll be making a special salad, (which should be up on the blog, soon!). The baking challenge asked that I transform a drink into a dessert. My gut reaction was to make raspberry lemonade cupcakes, (YUM!), but instead I went for my interpretation of a cup of herbal tea. Vanilla Lavender Cupcakes with Honey Cream Cheese Frosting.


There are still plenty of weeks left, even though it certainly feels like things at work are winding to an end. Luckily, the end of the school year should lead to fewer iphone pics, and more posts to read! Enjoy!

Wednesday, April 11, 2012

Oreo Rice Krispy Treats


I am a sucker for a good rice krispy treat.

My college dining hall had rice krispy treats at the dessert table at practically every lunch and dinner. For years I had daily access to rice krispy treats, sometimes with a chocolate layer on top. What?! Rice krispy treats need more deliciousness to convince people to eat them? I was shocked, too.


I got over the shock pretty quickly because, well, there was a layer of chocolate on my marshmallow crispy rice square and it was awesome. Since then, I've topped my rice krispy treats with colorful sprinkles and have brought them to birthday gatherings, work, and other social events. They are super easy to throw together, and pretty easy to travel with. Definitely a low-hassle dessert.

If done right, rice krispy treats do not go ignored. Mix crushed Oreos into your treats and top them with a layer of chocolate and sprinkled Oreo bits? People may just start to consider you a God among humans.


Oreo Rice Krispy Treats

Ingredients

*For the treats
1/4 cup unsalted butter
1 (10 oz) bag of marshmallows
6 cups of crispy rice cereal
10 crushed Oreo cookies

*For the topping
1 1/3 cup of chocolate chips
2 tablespoons unsalted butter
1 splash (about 1/8 cup) heavy cream
6 crushed Oreo cookies

Directions
Prepare a 13 by 9 pan with nonstick spray. Set aside.

In a large sauce pan over medium heat, melt the 1/4 cup of unsalted butter. Just before all of the butter melts, add the 10 ounces of marshmallows. Stir the marshmallows with the butter in order to melt them. Lower the heat and be cautious of not burning the bottom of the pan, remove from heat if necessary. (You can always return the marshmallows to the flame if the melting process slows down).

Once the marshmallows have lost most of their form, stir in the 6 cups of krispy rice cereal. When adequately mixed, fold in the 10 crushed Oreos. Transfer marshmallow mixture to 13x9 pan. Use greased spatula to press cereal treat down to mold to the shape of the pan.

In a small sauce pan melt the chocolate chips together with the 2 tablespoons of butter over medium-low heat. Just as the butter has combined with the chocolate add about an ounce of heavy cream so that chocolate reaches desired consistency. Whisk together until well combined.

Pour chocolate mixture over the rice krispy treats and spread with a spatula. Top with the 6 crushed oreos before the chocolate hardens. Cool completely before cutting and serving.