Pages

Showing posts with label dessert. Show all posts

Monday, August 20, 2012

Raspberry Limoncello Popsicles


I refuse to admit to myself that summer is ending.


It's difficult each year, but usually I become too bored to stay home any longer. 


Unfortunately, summer 2012 hasn't bored me, yet.


As the tan fades, and September approaches, I just have to be honest with myself; it's been a good break. 


There really isn't anything else I can do but sit back, (maybe in a hammock), put my feet up, and have a popsicle.


Raspberry Limoncello Popsicles
(makes 4 medium-large popsicles)
adapted from Everyday Food

Ingredients
1/2 pound fresh raspberries
3 oz. simple syrup
1 oz. plus 1 tablespoon limoncello
2 tablespoons lime juice

Directions
In a medium bowl, mash the raspberries. Add the simple syrup, limoncello, and lime juice to mashed berries. Stir until well combined. Pour into popsicle molds and freeze at least 4 hours, or until completely frozen. 

Monday, August 13, 2012

Raspberry Streusel Tart


Summertime is berry time. Summertime is also "I can't possibly turn on the oven in this heat" time. As I was living in an apartment without air conditioning, you can see how this could be a problem. I wish I could tell you there was an easy solution, but there isn't. So, what did I do? I moved. Plain and simple. Up and left my apartment, and moved into one that allowed me to bake in the middle of a heat wave.


Sure, I'm going to end up paying for it in the electric bill, but until I see my first invoice, I'm going to go ahead and say it's been worth it. This tart, topped with a dollop of whipped cream, worth it. Not to mention the smells that take over your home as it bakes. I'm obsessed with baking smells. This one is top notch.


Raspberry Streusel Tart
from The Joy of Cooking
makes one 9 1/2" - 10" tart, serves 8

Ingredients
(shortbread crust)
1 1/4 cups all-purpose flour
1/3 cup sugar
1 teaspoon grated lemon zest
1/4 teaspoon salt
8 tablespoons unsalted butter, softened
2 large egg yolks, divided

(streusel)
2/3 cup all-purpose flour
2/3 cup chopped walnuts
1/3 cup sugar
1/3 cup brown sugar
5 tablespoons unsalted butter, melted
1 teaspoon ground cinnamon
1/4 teaspoon salt

(filling)
3 cups raspberries
1/2 cup sugar
2 tablespoons cornstarch
1 tablespoon fresh lemon juice

Directions
(Shortbread crust)
In a medium bowl, whisk together the flour, sugar, lemon zest and salt. Add the softened butter and mash into the flour mixture with the back of a fork, or the bottom of a whisk. Mash until the mixture resembles course crumbs. Add one large egg yolk and mix together with a spatula, pressing dry bits into the dough to incorporate. Mix until dough comes together in a ball. Cover in plastic wrap and refrigerate for at least 30 minutes, (up to 2 days).

(Streusel)
In a small bowl, whisk together the flour, sugars, walnuts, cinnamon and salt. Add dry mixture to melted butter and blend well. Mixture will also resemble course crumbs. Set aside.

(Filling)
In a medium bowl, stir together the raspberries, sugar, cornstarch and lemon juice until just combined.

Assembling the tart
Preheat oven to 400 degrees Fahrenheit. Grease the bottom of the pie pan, dusting with flour. Pat the shortbread dough evenly over the bottom and sides of the prepared pan. Using the tines of a fork, poke holes throughout the bottom and the sides of the soon-to-be tart crust.


Bake until deep golden brown, (18 - 22 minutes).

Whisk together the remaining egg yolk with a pinch of salt. Brush the inside of the shortbread crust with the yolk. Return crust to oven until egg glaze sets, (1 - 2 minutes). Let cool completely.


Preheat oven to 350 degrees Fahrenheit. Distribute raspberry mixture evenly in tart crust. Sprinkle streusel over the berries and bake the tart until the streusel has browned and thick juices bubble up near the center, (45 - 60 minutes). Let cool completely on rack. Best served the day it is made.


Thursday, August 2, 2012

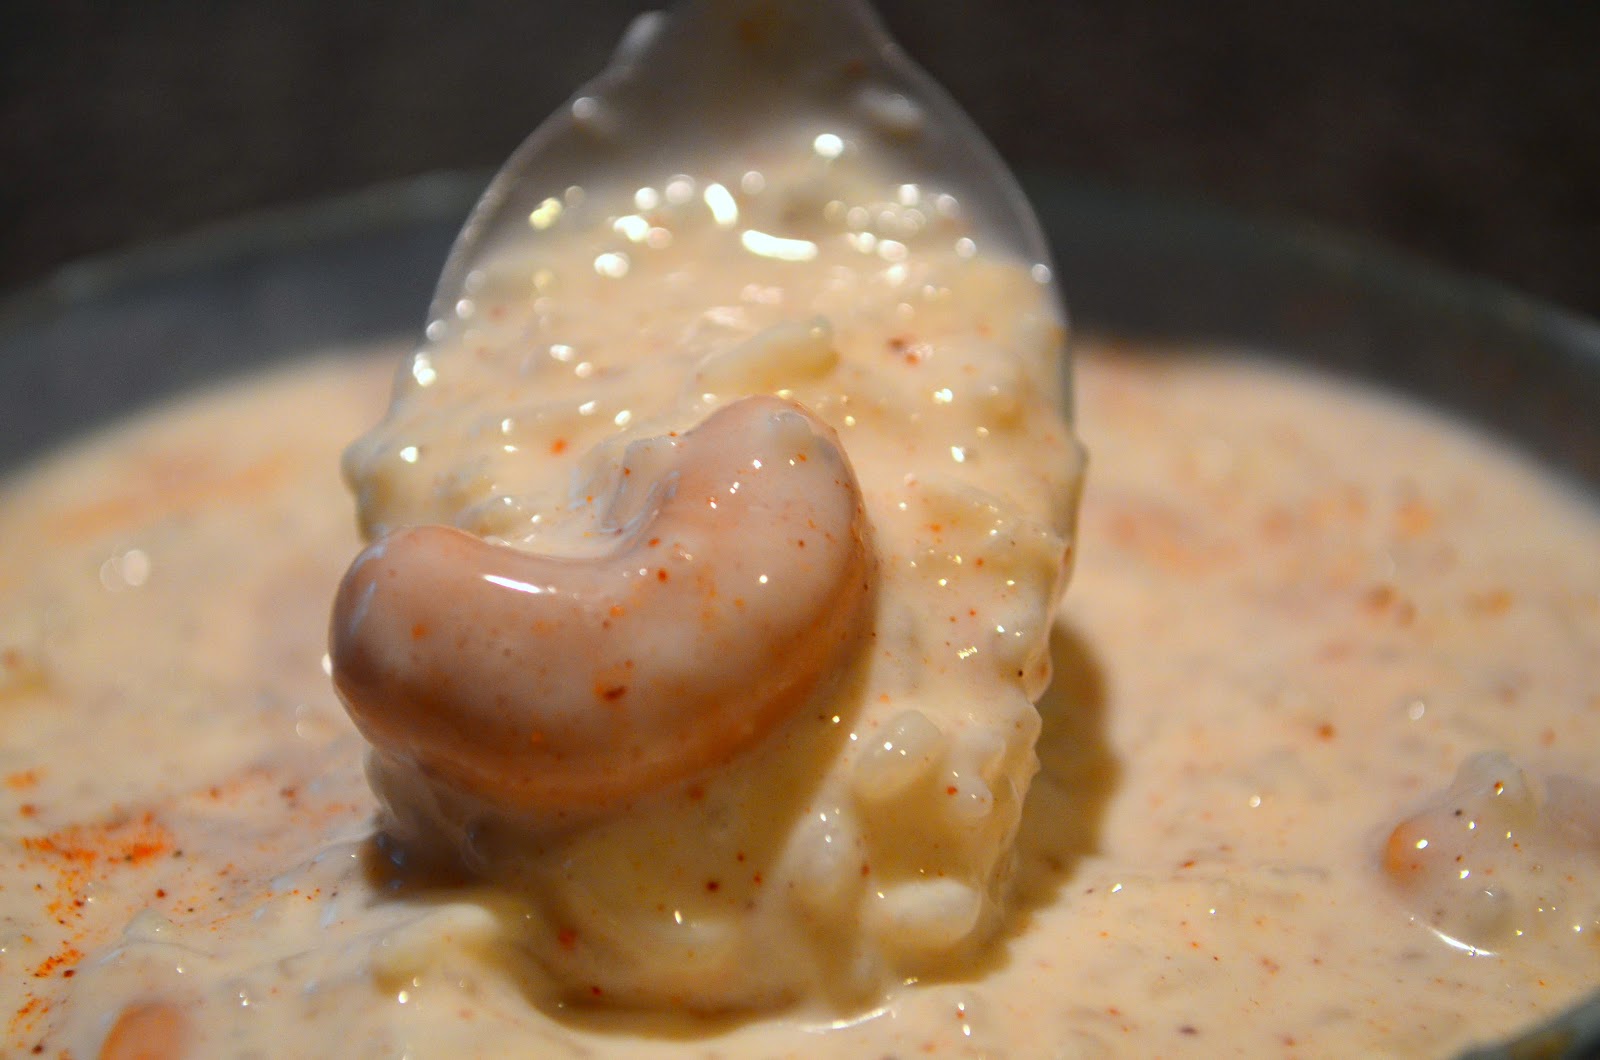
Rice Pudding with Coconut Milk and Cashews


A while back, my friend and I were in New York and found ourselves visiting a gelato shop in Chelsea Market. The display case was so tempting, we just couldn't resist. The only problem was that the flavor names were in Italian.

Normally, I have no problem asking people questions, but when it comes to gelato, I knew I'd ask a TON of questions. Seeing as how it was very busy that day, I panicked and picked a flavor at random.

The gelato was creamy and delicious, the flavor so difficult to identify. It couldn't have been vanilla, and there were these small pieces of unidentifiable solid....grains of rice?

Then it clicked. Rice pudding gelato. And it was amazing.


Week 26 of the challenge requires a gluten free recipe, which got my mind back on rice pudding. A few nights prior, I had made basmati rice, and ended up with leftovers. Luckily, after doing a little research, I realized that most rice pudding recipes have you start by cooking the rice. It was like I was already halfway done!


Since I was using basmati rice, I chose to include coconut milk, and some nice spice combinations. Cashews for texture? Why not.


Rice Pudding with Coconut Milk and Cashews
serves 6
adapted from Alton Brown

Ingredients
2 cups cooked basmati rice
2 cups milk
1 cup heavy cream
1 1/2 cups coconut milk
1/2 cup sugar
1/4 teaspoon cinnamon
1/4 teaspoon nutmeg
2/3 cup whole roasted cashews

Directions
In a large nonstick saucepan, combine the cooked rice and milk over medium-high heat. When the mixture begins to boil, bring the saucepan to a simmer and cook until thickened, stirring often. (About 10 minutes).

Bring the heat back up to medium-high and add the heavy cream, coconut milk, sugar, cinnamon, and nutmeg. Stir frequently and cook until the mixture begins to thicken again, (about 15 - 20 min). Once the mixture starts to thicken, stir in the cashews and remove from heat.

Serve rice pudding in little dishes, top with a light sprinkle of either of the spices. Tastes great hot or cold. (Can be chilled in refrigerator overnight.)

Friday, May 25, 2012

Peanut Butter Rice Krispy Treats


I've previously shared my love/fascination/appreciation for rice kripsy treats. At the rate we're going, they could be their very own food trend. Move over cupcakes, cake pops, and mini pies, rice krispy treats are going to rule this town.


Think about it! You have either plain, chocolate, or fruity rice cereal; the marshmallows come in all sorts of colors/flavors! Then, there's all the other flavors you could mix in: chocolate, peanut butter, mint, dulce de leche...

The krispy revolution has the potential to be amazing.

Here's one step closer to taking over the dessert world with crispy rice cereal treats, and all you need is 5 ingredients!


Yes, crispy...with a C. When this revolution starts picking up speed, we want to avoid lawsuits.

Peanut Butter Rice Krispy Treats

Ingredients
3 tablespoons unsalted butter
10 oz. package of mini marshmallows
1/2 cup creamy peanut butter
6 cups crispy rice cereal
1 cup butterscotch chips

Directions
Prepare a 9x13 glass pan with nonstick spray.

In a large pot, melt the 3 tablespoons of butter over medium-low heat. When the butter is almost completely melted, add the 10 oz of marshmallows. Using a spatula, coat marshmallows with hot melted butter to help speed the melting process. Occasionally remove pot from heat to avoid burning the bottom.

When the marshmallows begin to lose their shape, add the 1/2 cup of smooth peanut butter. Continue to heat, stir, and remove from heat as necessary. Marshmallow mixture will begin to look sticky and stringy. Continue stirring together until just combined.

Remove pot from heat completely, stir in the 6 cups of cereal. Add the cup of butterscotch chips, and combine well. Scrape contents of the pot into the prepared pan. Use your spatula to flatten cereal mixture into desired shape.
Cool completely before cutting.

Wednesday, April 11, 2012

Oreo Rice Krispy Treats


I am a sucker for a good rice krispy treat.

My college dining hall had rice krispy treats at the dessert table at practically every lunch and dinner. For years I had daily access to rice krispy treats, sometimes with a chocolate layer on top. What?! Rice krispy treats need more deliciousness to convince people to eat them? I was shocked, too.


I got over the shock pretty quickly because, well, there was a layer of chocolate on my marshmallow crispy rice square and it was awesome. Since then, I've topped my rice krispy treats with colorful sprinkles and have brought them to birthday gatherings, work, and other social events. They are super easy to throw together, and pretty easy to travel with. Definitely a low-hassle dessert.

If done right, rice krispy treats do not go ignored. Mix crushed Oreos into your treats and top them with a layer of chocolate and sprinkled Oreo bits? People may just start to consider you a God among humans.


Oreo Rice Krispy Treats

Ingredients

*For the treats
1/4 cup unsalted butter
1 (10 oz) bag of marshmallows
6 cups of crispy rice cereal
10 crushed Oreo cookies

*For the topping
1 1/3 cup of chocolate chips
2 tablespoons unsalted butter
1 splash (about 1/8 cup) heavy cream
6 crushed Oreo cookies

Directions
Prepare a 13 by 9 pan with nonstick spray. Set aside.

In a large sauce pan over medium heat, melt the 1/4 cup of unsalted butter. Just before all of the butter melts, add the 10 ounces of marshmallows. Stir the marshmallows with the butter in order to melt them. Lower the heat and be cautious of not burning the bottom of the pan, remove from heat if necessary. (You can always return the marshmallows to the flame if the melting process slows down).

Once the marshmallows have lost most of their form, stir in the 6 cups of krispy rice cereal. When adequately mixed, fold in the 10 crushed Oreos. Transfer marshmallow mixture to 13x9 pan. Use greased spatula to press cereal treat down to mold to the shape of the pan.

In a small sauce pan melt the chocolate chips together with the 2 tablespoons of butter over medium-low heat. Just as the butter has combined with the chocolate add about an ounce of heavy cream so that chocolate reaches desired consistency. Whisk together until well combined.

Pour chocolate mixture over the rice krispy treats and spread with a spatula. Top with the 6 crushed oreos before the chocolate hardens. Cool completely before cutting and serving.

Saturday, April 7, 2012

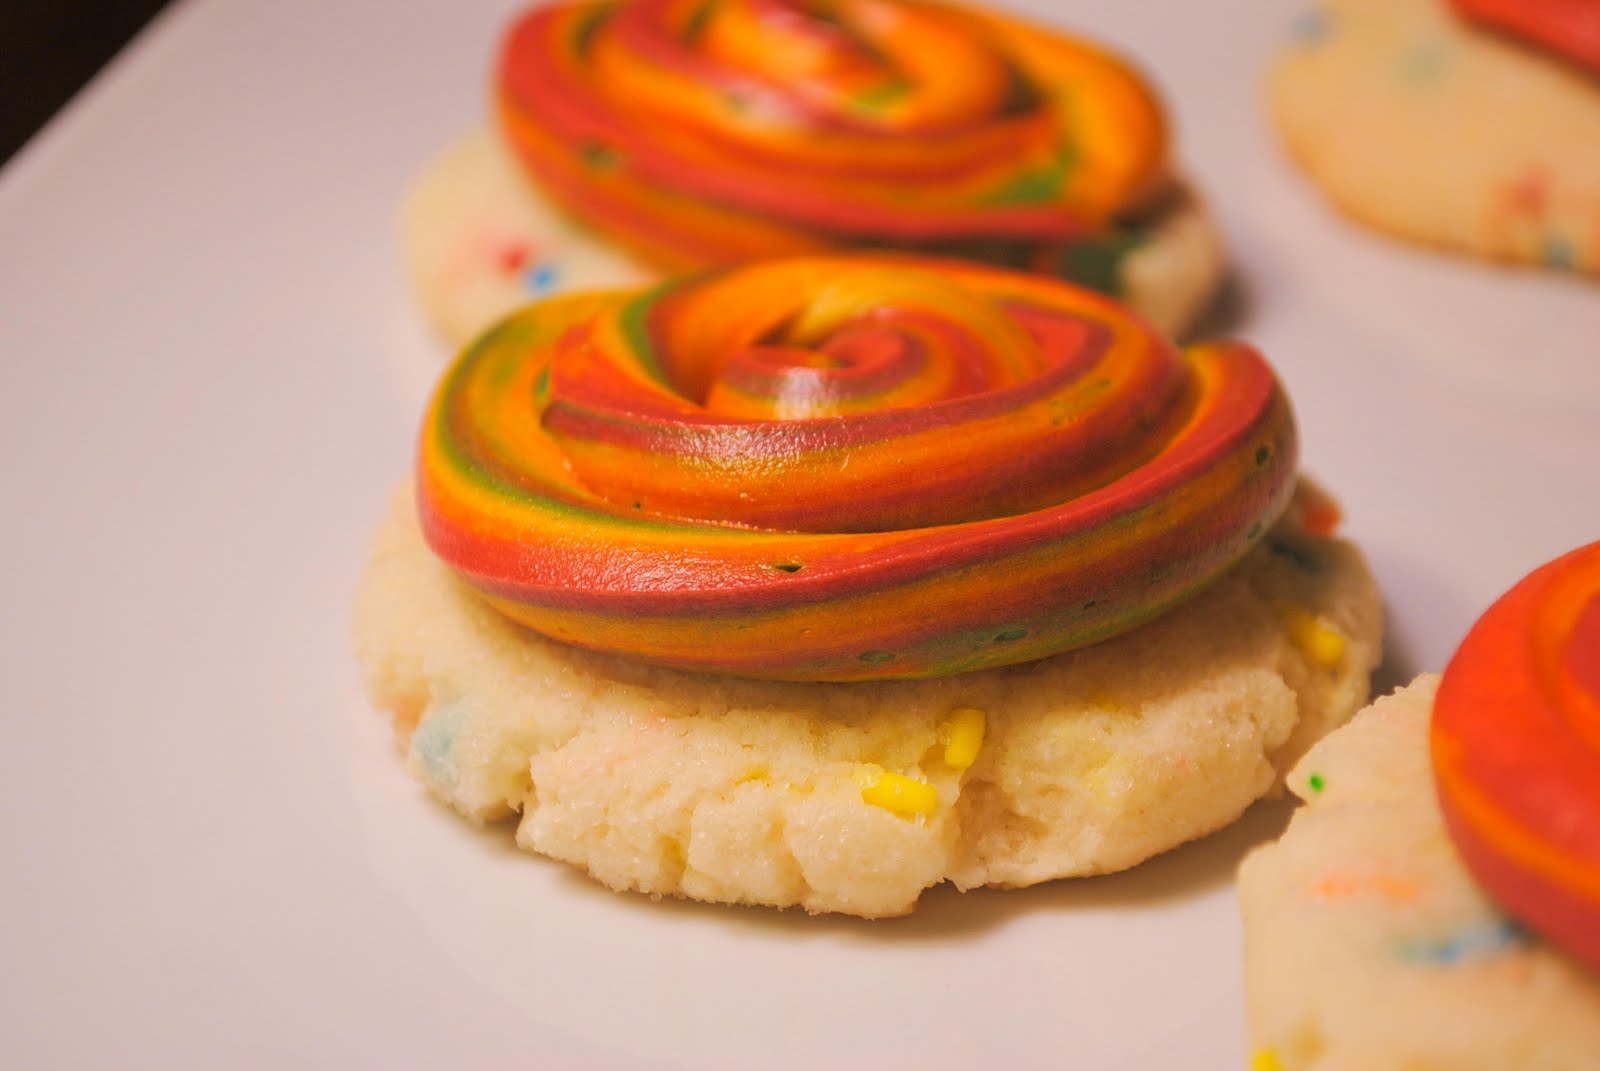
Rainbow Cookies


Fact: I tell my students that my favorite color is Rainbow.

I realize that it isn't a color, this much I know. What I don't understand is how putting red, orange, yellow, green, blue, and purple together, (in that order), makes me so freaking happy. Love seeing my pal ROY G. BIV.

The baking challenge this week asked for a baked good that represents the rainbow. I couldn't bring myself to make the rainbow cake, even though it is pretty amazing. I've been craving cookies for a bit, since I shipped most of these to California and hardly kept any for myself.

This recipe recreates the soft dreaminess of the Lofthouse sugar cookie. I went through quite a few sugar cookie recipes before I found one that even came the teeniest bit close to the mass produced goodness. My next challenge will be figuring out how to make them completely from scratch. Luckily, this recipe helped me fulfill the rainbow requirement by giving me an opportunity to use Funfetti cake mix.


Rainbow Cookies
adapted from Noshings
makes about 2 dozen

Ingredients
  • 1 18oz box of Funfetti cake mix
  • 2/3 cup AP flour
  • 2 large eggs
  • 1/3 cup vegetable oil
  • 2 tablespoons light sour cream
  • 1/3 cup of sugar, for rolling the cookie balls in
Directions
Preheat oven to 350 degrees. Prep baking sheet with parchment paper.
Pour cake mix into a medium bowl, combine with 2/3 cup of all purpose flour. Add 2 eggs, 1/3 cup of vegetable oil and the 2 tablespoons of sour cream. Mix until well combined making sure to break up any clumps of flour, dough will be thick.
Place the 1/3 cup of sugar in a small bowl.
Roll cookie dough into one inch balls. One at a time, drop cookie dough balls into bowl of sugar. Place cookie dough on the parchment papered baking sheet, sugar side up. Using the heel of your hand, or the bottom of a drinking glass, flatten the cookie dough until about 1/2 inch thick.
Bake cookies for about 10 minutes, cookies will still be soft to the touch, but aim to not brown the bottoms. Let cool on baking sheet for 1 minute before transferring to wire rack.
Let cool completely. Frost, if desired. (Trust me, you desire!)

Quick Buttercream Frosting
adapted from AllRecipes

Ingredients:
1/2 cup of unsalted butter
2 cups of powdered sugar
1 1/2 teaspoons vanilla
3 teaspoons heavy cream
Food coloring
Directions:
Cut stick (1/2) cup of butter to small cubes in order to soften. Using a wooden spoon, or similar cooking utensil, cream the room temperature butter until smooth and fluffy. Carefully combine with the powdered sugar, one cup at a time. Beat in vanilla extract, between cups of sugar, and mix in the teaspoons of heavy cream until frosting reaches desired consistency.

Tuesday, March 27, 2012

Baking Savory: Cape Chocolate Chip Cookies


I like the way that cape, chocolate, chip, and cookies all start with the letter C. I do not, however, like the way it reminds me of an English snob.

If you're reading this blog, I honestly hope you aren't an English snob. It's ok if you majored in English, or read a lot of books, just as long as you don't make people feel bad about the way they speak or write.

I once had an English snob make a snide remark at me at a party. Not cool, English snob, not cool.

I remember it better than most memories. The way I was excited about having found a random example of an alliteration. The way he made sure to stomp on my feelings by telling me that it was NOT alliteration. According to him, and (I'm assuming) his English snob friends, in order for something to be an alliteration, there had to be 3 or more words starting with the same letter.

Really, English snob, really?

I don't even care if he was right or not, what I care about is how he went out of his snobby way to crush my alliterating hopes and dreams.

You may have noticed that I am in no way an English snob. I write this blog the way I speak, the way my mind rattles out thoughts. I even speak the way my mind shoots ideas around. This means that sometimes I leave out important words in my speech, like prepositions, or subjects of sentences. I may also be leaving out these words as a result of falling down the stairs last month, whatevs.


What matters is that my friends aren't English snobs, and that I can find a way to convince people that these Cape Chocolate Chip Cookies are NOT weird.

Cape Chocolate Chip Cookies
adapted from Emeril

Ingredients
1 cup of butter (2 sticks)
1 cup of sugar (divided into halves)
1 teaspoon vanilla
1/4 teaspoon salt
1/2 cup chocolate chips
1/2 cup finely crushed potato chips (Cape Cod, for alliteration!)
1 cup all purpose flour
1 cup bread flour (because I ran out of AP)

Directions
Preheat your oven to 350 degrees. In a large bowl, cream together the cup of butter with a half cup of sugar. Mix in the teaspoon of vanilla and the 1/4 teaspoon of salt. Add the 1/2 cup of crushed Cape Cod, and the 1/2 cup of chocolate chips. Stir well. Finally, add the two cups of flour and mix until well combined.

Place remaining 1/2 cup of sugar in a shallow bowl. Using a tablespoon to help measure, form cookie dough mixture into little balls. Roll the balls in the sugar before placing on the cookie sheet. Gently press down on the cookie balls with the bottom of your bowl. Sprinkle tops with extra crushed chips and sea salt flakes*(See note).

Bake the cookies for 14 to 16 minutes. Transfer to wire rack to cool.


*I have an excessive amount of salt on the tops of my cookies. After further consideration, they are much better with only a little bit of salt sprinkled on top. Emeril dips his in chocolate. This is worth considering.

Monday, March 12, 2012

Butterbeer Cupcakes


I'm amazed that it is only the tenth week of the year. New Year's seems so long ago, and we have been working on so many projects in the classroom since classes resumed from winter break.

One special day we had in the classroom recently, was Read Across America Day on Friday, March 2nd. It happened to coincide with Dr. Seuss' birthday, so many of the classrooms at our school celebrated accordingly. Students brought in sleeping bags, comfy clothes, and piles of books, and we dedicated the whole day to reading. We took our third graders down to the Pre-K room and read to the preschoolers, too.

Soon after, Week 10 of both the cooking and the baking challenge asked for Movie or Book inspired recipes. Luckily, this one is both; and from my favorite book series, too!

I adore the Harry Potter books. I spent all of my middle school and high school years reading a book, or between books. Then the movies came along to add on to the fun. Even after I started college, the last book came out and I went to a book-release party and had a blast. The series is something I'll always look fondly upon and associate with such good memories. These cupcakes are a great way to celebrate them!


Butterbeer Cupcakes
with Butterscotch Buttercream and Butterscotch Ganache

Slightly adapted from The Pastry Affair

these quantities make 8 cupcakes

1 cup all purpose flour
3/4 teaspoon baking powder
1/4 teaspoon baking soda
pinch of salt
1/2 stick of butter (4 tablespoons)
1/2 cup light brown sugar
1 extra large egg
1 teaspoon vanilla
1/2 teaspoon butter flavoring
1/4 cup cream soda
1/4 cup whipping cream + 1 teaspoon vinegar

Preheat oven to 350 degrees.

In a small bowl whisk together the cup of flour, 3/4 teaspoon baking powder, 1/4 teaspoon of baking soda and the pinch of salt. Set aside.

Measure out the 1/4 cup of whipping cream and mix in the teaspoon of vinegar. (This takes the place of the buttermilk from the original recipe.) Set aside.

In a large mixing bowl, beat together the 1/2 stick of butter and the 1/2 cup of brown sugar until fluffy. Add the egg and beat well. Mix in the teaspoon of vanilla and the 1/2 teaspoon of butter flavoring.

Add a 1/3 of the flour mixture into the larger bowl with the butter and mix together. Stir in the whipping cream (with vinegar), then another 1/3 of flour mixture. Mix in the cream soda, and fold in the remaining flour mixture. Mix gently in order to avoid overbeating.

Fill lined cupcake pan with the batter, and bake for 15 - 18 minutes, testing for doneness with a toothpick. Cool completely before frosting.


Butterscotch Ganache
(enough for 8 cupcakes, and a bit leftover)
1/2 cup heavy whipping cream
1/2 cup and 1/3 cup of butterscotch chips (equal to about 1/2 of an 11 oz. package)

Melt butterscotch chips with the heavy cream in a small saucepan over medium heat. Stir often, until smooth. Remove from heat, and cool to room temperature, stirring occasionally.


Butterscotch Buttercream
(enough for 8 cupcakes)
3 tablespoons unsalted butter, softened
2 tablespoons Butterscotch Ganache
1/2 teaspoon vanilla
1/2 teaspoon butter flavoring
pinch of salt
1 1/2 cups of powdered sugar
2 tablespoons of heavy cream

In large mixing bowl beat the softened butter until fluffy. Mix in butterscotch ganache, vanilla, butter flavoring, pinch of salt. Beat in powdered sugar for 2 - 3 minutes. Add the cream one tablespoon at a time until reaching desired consistency.

To Assemble
  • Using a paring knife, cut out the top of the cupcake in a cone shape.
  • Fill the space with 2-3 teaspoons of Butterscotch Ganache
  • Gently place the cupcake top back on.
  • Top with Butterscotch Buttercream, making sure to cover the cut from the knife.
  • Drizzle Ganache over the cupcake and buttercream.

Wednesday, February 29, 2012

Pantry Cookies


These are my ultimate care package cookies.

These are my "I can't decide if I want oatmeal, peanut butter, or chocolate chips in my cookies" cookies.

Usually, multiple types of chocolate go into this cookie. Nuts and dried fruit often make an appearance in these cookies. (White chocolate and dried cranberries? Amazing.) Peanut butter and oats are a must for these cookies. How else can I make myself believe they are a legitimate breakfast item?


The beauty of these cookies is that you make them your own. Have some spare M&Ms lying around? Toss them in. Like pecans, but love walnuts too? Sure, have both! Can't decide between dark or milk chocolate? Mix and match, pick and choose, it all works out in the end.

The base for this cookie is an oatmeal cookie recipe. When you add your favorite mix-ins it becomes your own. Pantry Cookie is what I'm calling it, but call it what you want because it's yours!


Pantry Cookies
Originally "Garbage Cookies" by i am baker.

Ingredients
1 1/2 cups of all purpose flour
1 teaspoon baking soda
1 teaspoon baking powder
1 teaspoon salt
2 teaspoons cinnamon
1/2 teaspoon allspice
2 eggs
1 teaspoon vanilla
3/4 cup unsalted butter, softened
3/4 cup granulated sugar
3/4 cup brown sugar, packed
1 1/2 cups whole oats

additions:
(measurements are only suggestions, feel free to alter to your liking)
1/4 to 1/2 cup peanut butter (optional) 
1/2 cup peanut butter chips
1/4 cup chocolate chips
1/4 white chocolate chips
1/4 cup chopped pecans

1/4 cup dried cranberries (not pictured)


Directions

Preheat oven to 350 degrees. Prepare baking sheet with parchment paper.

In a medium bowl, sift together the 1 1/2 cups flour, the teaspoons of salt, baking powder, baking soda, the 2 teaspoons of cinnamon and the 1/2 teaspoon of allspice. Set aside.

In a large bowl, cream together the 3/4 cup of softened butter, the 3/4 cup of brown sugar, and the 3/4 cup granulated sugar. When fluffy, mix in the eggs, one at a time. Stir in the vanilla.

Add the dry ingredients to the butter mixture, along with the 1 and 1/2 cup of oats. Add peanut butter (if desired), mixing until just combined.
Fold in your additions to make this cookie your own masterpiece!


Using a tablespoon, drop rounded mounds of cookie dough on baking sheet. Bake for 8 - 12 minutes turning halfway through. Allow to cool on baking sheet for 2 minutes, transfer to wire rack to cool completely.


Disclaimer: you can make pantry cookies even if you don't own a pantry.

Saturday, February 25, 2012

Dirt and Worm Cupcakes


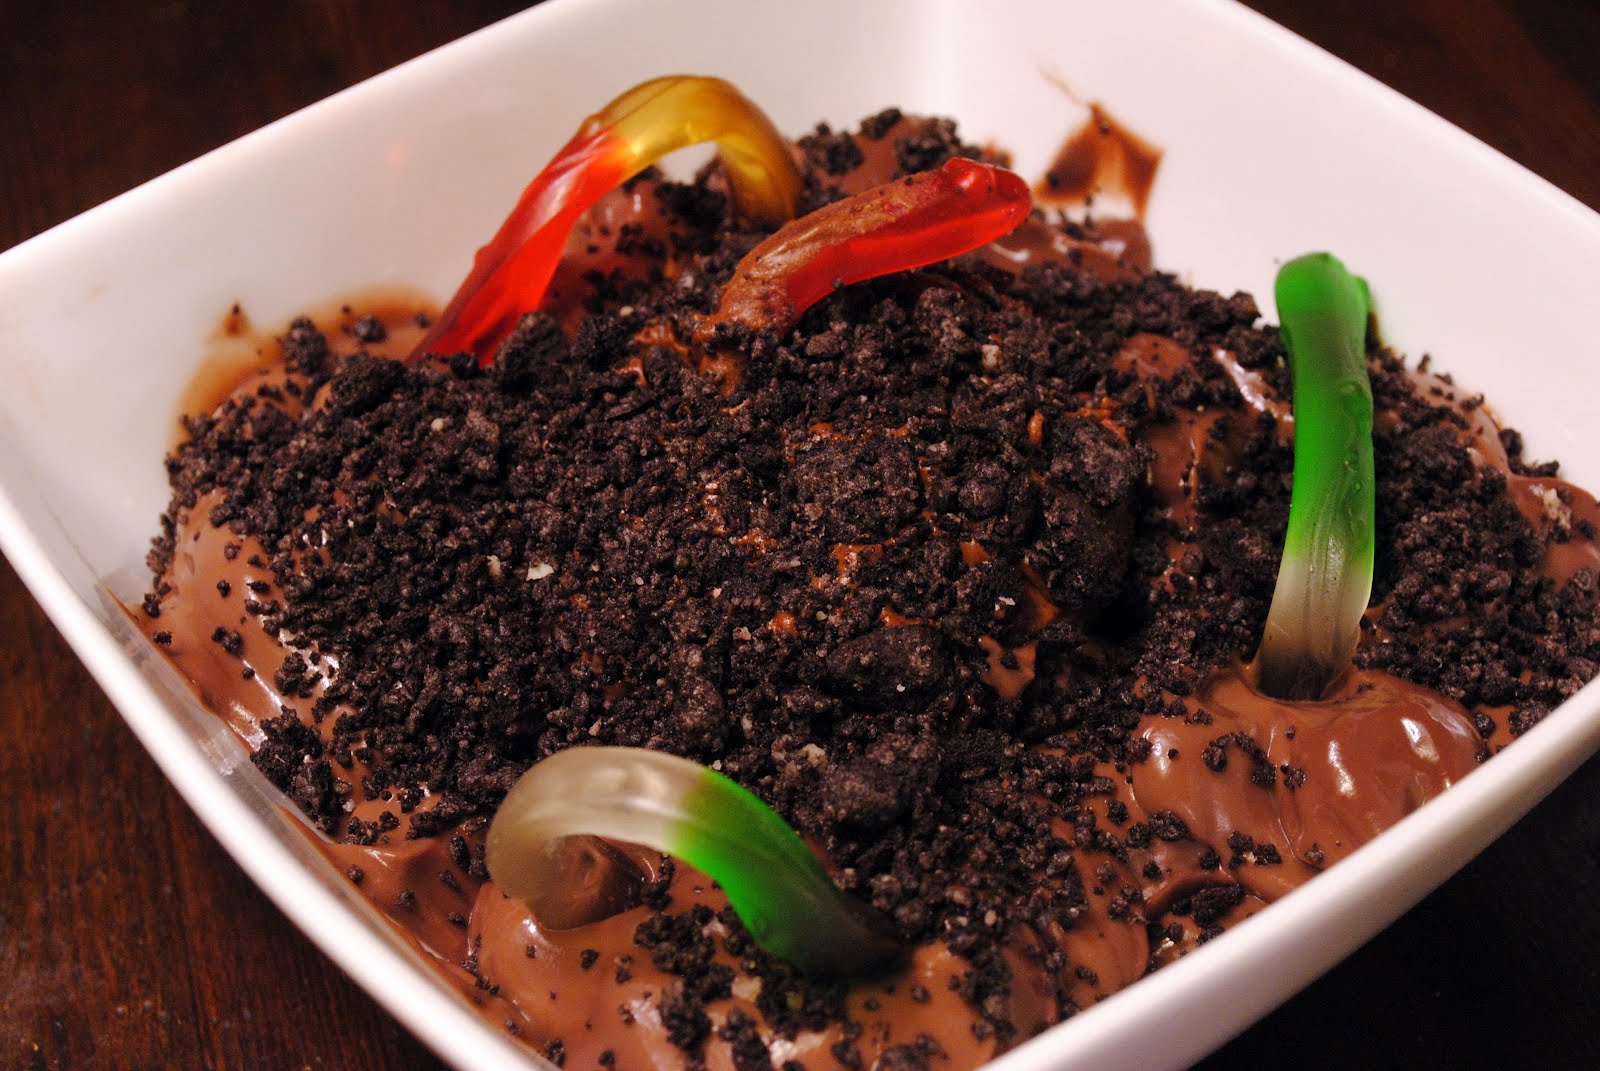
A friend from college said that one of her best childhood memories was a birthday party that her mom had planned for her. In place of cake, her mom served dirt and worm cups out of a pot that had a flowers growing in the middle. I imagine it looked something like this.

This week's baking challenge, "candy decorations", left room for lots of creativity. As soon as I thought of gummy worms paired with oreo crumbs and chocolate, I couldn't think of anything else I'd rather make.

Instead of pudding, these worms call chocolate frosted chocolate cupcakes their home. Unfortunately, this wasn't good enough for the dirt cup enthusiast in my life, so the worms found themselves in a totally unique (read: diabetes-inducing) environment.


Here, the cupcake is more of an island, surrounded by the pudding-loving worms. It's a dirt bowl! The best of both worlds.

Easy Chocolate Cupcakes
slightly adapted from G.R.

these quantities makes 12 cupcakes

Ingredients
  • 1/3 cup and 2 tablespoons butter, softened
  • 3/4 cup and 3 tablespoons white sugar
  • 3 eggs
  • 1 teaspoon vanilla extract
  • 1 cup and 2 tablespoons all-purpose flour
  • 1/2 cup and 1 tablespoon unsweetened cocoa powder
  • 1-1/2 teaspoons baking powder
  • 1/4 teaspoon salt
  • 1/2 cup and skim milk
  • 1 tablespoon light sour cream
Directions

Preheat oven to 350 degrees. Line muffin pan with 12 baking cups.

In a medium bowl, beat the sugar and butter together until fluffy. Add the eggs and vanilla, mix well. In a separate bowl, whisk together the flour, cocoa powder, baking powder and salt. Stir the flour mixture into the butter mixture, alternating with the milk and the sour cream. Stir until just blended.

Scoop the batter into the prepared cup liners, dividing the batter evenly.

Bake for 20 to 25 minutes, or when toothpick inserted into the center comes out clean. Cool in the pan set on a wire rack. Frost and serve.


Rich Chocolate Frosting
By Amy Via

These quantities make enough for a dozen cupcakes

Ingredients
  • 1/4 cup butter, cut into cubes, softened
  • 1 cup and 2 tablespoons powdered sugar
  • 1/4 cup and 1 tablespoon cocoa powder
  • 1/2 teaspoon vanilla extract
  • 2 tablespoons milk
Directions
In a medium mixing bowl, cream butter. Gradually beat in powdered sugar, cocoa and vanilla. Add enough milk until frosting reaches spreading consistency.

For Dirt & Worm Topping:
1 row of Oreos, crushed.
1 package of gummy worms

Place Oreo crumbs into a small bowl. Frost cupcakes.

Using a pairing knife, cut a small triangle portion from the top of the cupcake. Stuff half of a gummy worm into the little triangle space. Fill remaining space with more chocolate frosting. Dip cupcake tops into the bowl of crushed Oreos, making sure to lift the worm and covering entire surface.

Friday, February 17, 2012

Chocolate and Peanut Butter


We have a great partnership, the boyfriend and I.

He can count on me to make delicious meals and desserts, and I can count on him to enjoy them. Sometimes, I end up giving away the treats I've made, and leave him feeling betrayed, offended, and truly hurt.
Take the cupcakes from the other day for example. He only enjoyed two of them before I whisked the roses away to work. He was not pleased. I had every intention of making up for it with a valentine's day dessert, except the dessert totally tanked :(

It was a sad day for us both. Fortunately, we were able to move past the failures that occurred that day, and enjoyed a dessert that was familiar, and comforting, but still lovely and wonderful.


Pizookie.

Although I'm sure it's served in countless restaurants, this pie-sized chocolate chip cookie, (or other variety), topped with ice cream was made famous by BJ's . I've made it a few times, serving it with the best mint patty yogurt in Massachussetts. This time, I set out to make a special edition for the special chocoholic in my life.


PB Chip Chocolate Cookie
(baked in a 9" pie plate)
Serves 6-8

Ingredients:
1/2 cup unsalted butter (1 stick)
1/4 cup and 2 tablespoons granulated sugar
1/4 cup and 2 tablespoons packed brown sugar
1 egg
1 teaspoon vanilla extract
1 cup all purpose flour
1/3 cup cocoa powder
1/2 teaspoon salt
1/2 teaspoon baking soda
1 cup peanut butter chips

Directions:
Pre-heat oven to 350 degrees. Grease a 9" pie plate and set aside.

In a large bowl, beat together the butter and both of the sugars until fluffy. Add eggs and vanilla to the butter/sugar, mix in well.

In a separate bowl, whisk together the cup of flour, 1/3 cup of cocoa powder, 1/2 teaspoon of salt and the 1/2 teaspoon of baking powder.

Add the flour mixture to the butter mixture and beat until well blended. Mix in the cup of peanut butter chips.

Using a spatula, spread the cookie dough in the greased 9" pie plate. Bake at 350 degrees for 25 minutes. Cool cookie in pie plate on a cooling rack before cutting.


Serve topped with a generous helping of your favorite ice cream!


Sunday, February 12, 2012

A Dozen Roses

Can you trust someone who doesn't like dessert?

I am always a little disappointed when people turn down a baked good. I can understand not ordering dessert after a huge dinner, but turning down a cupcake that I hand crafted for you? I don't know how to respond to a person like that. Except for my uber-healthy-on-the-verge-of-vegan friend Drew, I am always a little guarded around these people who claim they aren't a fan of sweets.

Besides, I can trust Drew because even though he doesn't always want a cupcake, he'll eat it if I insist.


It has been a very long time since I made cupcakes. I didn't even bring any of my cake pans from California. Then, week 6 of the baking challenge came along, and I decided to work on my decorating skills. The challenge: elegant.

It was a really fun challenge to prepare for. I loved going through cupcake pictures for inspiration, and shopping at Michael's for supplies is always fantastically overwhelming. (The only store where I could spend hours standing in front of the same aisle). I bought the cute liners, and the pearlized sprinkles at decent prices, (one on clearance, the other with a coupon). I also did a lot of youtube research on making frosting roses. (NEVER made them before!) All sorts of new learning going on.


Vanilla-bean Butter Cake
slightly adapted from organic and chic

Makes 12 happily domed cupcakes*

Ingredients:
1 stick (1/2 cup) unsalted butter, softened
1 1/4 cup sugar
2 eggs
1/2 cup milk
1 tablespoon vanilla extract
1 3/4 cup plus 1 tablespoon and 1 teaspoon all-purpose flour
3/4 teaspoon baking powder
1/4 teaspoon salt

*Some of my ingredient amounts are pretty wonky since I "halved" the recipe. To make 24 cupcakes the sugar and flour amounts would be 1 3/4 cups and 2 3/4 cups, respectively. I'll let you figure out the rest.

Directions:
Place rack in the middle of the oven. Preheat oven to 350 degrees.
Line cupcake pan with 12 cupcake liners.

In a medium bowl cream the stick of butter butter and the 1 1/4 cups of sugar until fluffy. Add eggs, one at a time, mixing well.

In a small bowl or measuring cup, stir to combine the 1/2 cup of milk and the tablespoon of vanilla. Set aside.

In another bowl, whisk together the 1 3/4 cup, 1 tablespoon, and 1 teaspoon flour, 3/4 teaspoon baking powder and 1/4 teaspoon salt.

While stirring between each addition, add about a third of the flour mixture to the butter/sugar, followed by half of the milk mixture. Repeat with another third of the flour mixture, and the remaining half of the vanilla milk. Combining until just incorporated, add the final portion of the flour mixture. Stir batter well, making sure to scrape the edges of the bowl.

Distribute batter evenly between the 12 cupcake liners and bake for about 25 minutes, turning halfway between. Cupcakes should be golden, and can be tested by inserting a toothpick to the center that comes out clean.

Let cupcakes cool in pan for 10 minutes, before placing on rack to cool completely.

Sunday, January 22, 2012

Salted Oatmeal White Chocolate Chip Cookies


Oatmeal cookies are so versatile. To many, oatmeal-raisin is not very exciting, but there are so many other options for your oats. Oatmeal can pair up with chocolate chips, dried cranberries, coconut, m&ms, or so many other ingredients to make a lovely cookie.

What sets this cookie recipe apart is the salt flakes you sprinkle over the cookie dough right before putting it into the oven. The white chocolate already tastes great with the oatmeal, but the slight saltiness enhances the flavors to a point where the cookies become addicting. Sandwich them around a scoop of vanilla ice cream? Bliss!


Crispy Salted Oatmeal White Chocolate Chip Cookies
By Smitten Kitchen

Sunday, January 15, 2012

Mini Whoopie Pies


Whoopie pies are completely unfamiliar to me. I had first heard about them years ago, when I followed How To Eat A Cupcake. I was still in my cupcake phase, so I never tried branching out to any of her other recipes, but these always stayed in the back of my mind.

I was eager to try them this week though, after the baking challenge asked we make something "miniature". Aside from the marshmallow cream, (or should I say creme?), the ingredients were all things I already had on hand. The process was very simple, and the feedback was all positive.

Mini Whoopie Pies
Adapted from Real Food for Healthy Kids via Epicurious

Cake:
  • 2 cups unbleached all-purpose flour
  • 1/2 cup unsweetened cocoa
  • 1/2 teaspoon baking soda
  • 1/2 teaspoon salt
  • 1 stick unsalted butter, at room temperature
  • 1 cup granulated sugar
  • 1 large egg
  • 1 cup milk
Filling:
  • 1 stick unsalted butter, softened
  • 2 cups powdered sugar
  • 1/2 teaspoon vanilla extract
  • 7 oz. jar marshmallow creme

Arrange the oven racks in the upper and lower thirds of the oven and preheat the oven to 425°F. Line 2 large baking sheets with parchment paper.

Make the cakes:
Whisk together the flour, cocoa, baking soda and salt in a medium bowl.

Cream the butter and sugar in a large bowl until fluffy, about 4 minutes. Add the egg and beat at medium speed until incorporated. At low speed, add the flour mixture in 2 batches, alternating with the milk, mixing until just blended.

Using a pastry bag, drop 18 generous teaspoons of batter onto each sheet, leaving about 2 inches between cakes. Bake the 2 sheets together for 5 to 7 minutes, until cakes are springy to touch. Let cool on the sheets for 5 minutes, and transfer to racks to cool completely. Change the parchment and repeat using the remaining batter (about 72 cakes in total).

Make filling:
Beat the butter and powdered sugar until fluffy, about 5 minutes. Add the vanilla and marshmallow creme and mix until blended, about 1 minute.

Match pairs of cake of the same shapes/sizes and use pastry bag to dollup the bottom side of 1 cake with filling and sandwich together with the other cake.

(Store the finished whoopee pies in a covered plastic container and chill for up to 3 days.)