Pages

Saturday, January 7, 2012

Chocolate Peppermint Brownies


In my last post, I mentioned that I'm participating in a 52 week cooking challenge. I also decided to participate in the 52 weeks of baking challenge. It follows a similar format to the cooking challenge, and gives me a chance to bake with specific ingredients or themes in mind. This week's baking challenge is brownies.

Initially, I wanted to fall back on a chocolate/peanut butter recipe, but decided to push myself to try something new. I had never worked with peppermint before, (except for a batch of cupcakes I was making, which resulted in shattered candy canes EVERYWHERE), so I chose a recipe I had favorited a while back.

Even though the brownies bake for only 20 min, the recipe requires quite a bit of patience. Each portion of the brownie requires cooling, and the complete product needs to cool for 2 hours. This is definitely a recipe you want to start earlier in the day.


Grasshopper Brownies
Adapted from Smitten Kitchen

Brownie

1 1/2 sticks unsalted butter
10 1/2 oz semisweet chocolate chips
1 1/2 cups packed light brown sugar
3 large eggs, lightly beaten
1 1/4 teaspoons vanilla
3/4 cup all-purpose flour
1/4 cup plus 2 tablespoons unsweetened cocoa powder
3/4 teaspoon salt

For mint ganache
1/4 cup heavy cream
10 oz white chocolate chips
1 teaspoon peppermint extract

For chocolate ganache
1/2 cup heavy cream
10 oz semisweet chocolate chips

Make brownies:
Preheat oven to 375°F. Line a 13- by 9-inch baking pan with 2 sheets of foil, (one in each direction) leaving overhang on all sides. Spray foil with a nonstick spray.

Melt butter and chocolate with brown sugar in a medium saucepan over moderate heat, stirring occasionally, until smooth. Remove from heat. Whisk in eggs and vanilla until combined. Whisk in flour, cocoa, and salt until just combined.

Spread batter evenly in baking pan and bake until set, (a toothpick inserted in center should comes out with moist crumbs), about 20 minutes. Cool completely in pan on a rack, about 1 1/2 hours.

Make mint ganache:
In a small saucepan, over medium hear, melt white chocolate with the heavy cream. Whisk until smooth, remove from heat. Stir in peppermint extract and chill, covered, stirring occasionally, until thick, about 1 hour.

Make chocolate ganache:
In a small saucepan, over medium heat, melt chocolate together with the heavy cream. Whisk until smooth. Remove from heat, chill, covered, stirring occasionally, until thick, about 30 minutes.

Assemble layers:
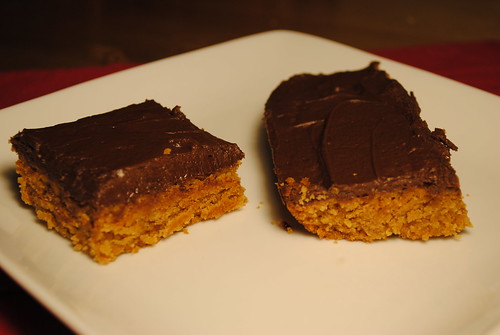
Spread mint ganache over top of cooled brownie in a thin even layer using a spatula to evenly distribute. Chill until firm but still slightly sticky, about 30 minutes.

Spread chocolate ganache over mint and chill about 2 hours.

Lift brownies out of pan. Cut dessert into squares and peel from foil.

Friday, January 6, 2012

Shakshuka


New Year! New recipes, and as a result new blog posts.

Throughout 2012, I'll be participating in reddit's 52 Weeks of Cooking challenge. Every week, I'll write about a recipe that features a specific ingredient, dish type, theme, or cooking technique. I'm also participating in the 52 Weeks of Baking challenge which follows a similar format.

As part of Week 1 in the challenge, (ingredient: eggs), I set out to make Shakshuka. A somewhat recent favorite in the dinner rotation, Shakshuka is eggs poached in a spicy tomato sauce. You may be glad to hear that the amount of spice can be controlled in case you aren't a fan of steam coming out of your ears. (Or of runny noses, teary eyes, etc). I've been putting hot sauce/red pepper flakes on about 90% of my meals, but I still believe the spice is very tolerable in the recipe below. Feel free to drop the number of peppers if you are worried.


Shakshuka
Adapted from Smitten Kitchen
1/4 cup olive oil
3 stalks of celery, chopped
5 Anaheim chiles stemmed, seeded, and finely chopped
1 small yellow onion, chopped
5 cloves garlic, chopped
1 teaspoon ground cumin
1 tablespoon paprika
2 14.5-ounce can petite diced tomatoes, undrained
Kosher salt, to taste
6 eggs
1/2 cup blue cheese, crumbled
1 tablespoon chopped flat-leaf parsley
Heat oil in a 12-inch pan over medium-high heat. Add chopped celery and cook for 5 minutes. Occasionally, give the chopped vegetables a stir. Add chiles and onions and cook until soft, about 6 minutes. Add garlic, cumin, and paprika, and cook, stirring frequently about 1 minute.
Add tomatoes to pan, along with 1/2 cup water, reduce heat to medium, and simmer, stirring occasionally, about 15 minutes. Season sauce with salt.
Crack eggs over sauce, evenly distributed across sauce’s surface. Cover pan and cook until yolks are just set, about 5 minutes. Remove from hear, baste the whites of the eggs with tomato sauce, being careful not to disturb the yolk. Sprinkle cheese and parsley over Shakshuka before serving.

Serve over rice pilaf and enjoy!

Thursday, November 4, 2010

Garlic and Herb Sirloin Roast with Guinness Gravy

One thing about our house is that we are very carnivorous. Ben's not a fan of cooked vegetables, and sometimes I think raw veggies are pretty boring, so we end up making hamburgers more often than we should, and salad doesn't happen enough.

I was running out of dinner ideas when I noticed my local grocery store ad. Tri tip roasts were on sale, and all I could think of was a delicious slow cooked roast my mom had made, with carrots and potatoes...

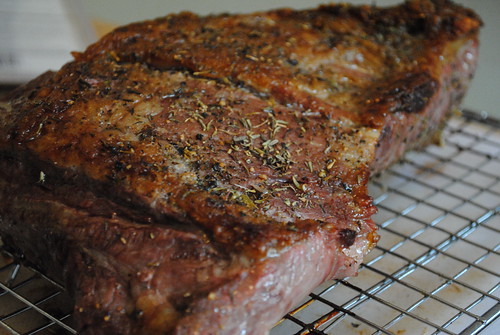
I picked up a 2.5 lb roast, a roast pan, meat thermometer, and pulled out my copy of The Joy of Cooking. While this isn't the same roast that my memory salivated for, it is definitely a delicious meal.

Garlic-and-herb Studded Sirloin Roast
adapted from The Joy of Cooking

1 boneless tri tip roast (between 1 and 3lbs)
2 large garlic cloves, thinly slivered
1 1/2 teaspoons dried thyme
1 1/2 teaspoons salt
1 teaspoon ground black pepper

1. Toss slivered garlic with thyme, salt, pepper.
2. Make slits in the roast and insert seasoned garlic slivers.
3. Rub the reamaining seasonings over the meat, then marinate the meat, covered, between 30 min and 2 hrs at room temperature or up to 24 hrs in the refrigerator.

Preheat oven at 425 degrees (F)
4. Roast beef in oven until internal temperature is 120-125 degree (F) for medium-rare.
(between 10 and 20 minutes per pound)
5. Remove meat to a platter, cover loosely with aluminum foil and let stand for 15-20 minutes before carving.
6. Carve roast into 1/8-in to 1/2-in slices.

Guinness Pan Gravy
adapted from The Joy of Cooking's "Pan Gravy for Meat"

2 tablespoons reserved fat from roasting pan
1-2 tablespoon AP flour
1 cup Guinness
Dried thyme, rosemary
Salt
Ground pepper
1 tablespoon butter

1. After pouring and reserving far from the roasting pan, place roasting pan on a burner over medium heat.
2. Pour in reserved fat and stir in all-purpose flour.
3. Cook, whisking or stirring constantly and scraping up browned bits from bottom and sides of pan, for several minutes to remove raw taste of flour and smooth the mixture.
4. Add Guinness, herbs, salt and pepper to taste.
5. Cook, whisking of stirring, until slightly thickened.
6. Swirl in butter and continue cooking to desired consistency.

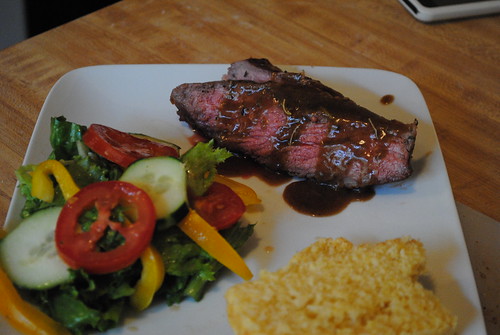
We enjoyed our gravy-topped roast with a side salad and a piece of corn bread.

Monday, November 1, 2010

Pizza!


I love foods that are bad for me. I'm crazy for sweets (ice-cream, candy), and cheesy, carb-y foods (burgers, chinese); therefore, it was pretty bad when I found out how EASY it was to make my own pizza. If I make it myself then it has to be better for me than the other stuff, right?

So I was living the dream when I put together two of these pizzas. Dough and sauce both made from scratch. I don't have a recipe for the sauce yet, (they were meatballs gone awry, but since they didn't hold their shape, it was basically a meaty marinara sauce).

I thought I'd share my pizza dough recipe.

Olive Oil Dough
From Artisan Bread in Five Minutes a Day
Great book that I bought from Amazon, which I highly recommend.
*Makes four 1-pound loaves. (For myself, 2 large pizzas) Recipe easily doubled or halved.

2 3/4 cups lukewarm water
1 1/2 tablespoo
ns granulated yeast (2 packets)
1 1/2 tablespoons Kosher salt
1 tablespoon sugar
1/4 cup extra virgin olive oil
6 1/2 cups unbleached, all-purpose flour (and for you more disciplined eaters, this could easily be substituted for all-purpose whole-wheat flours)

1. Mix the yeast, salt, sugar, and olive oil with the water in a 5-qt bowl, or a lidded (not airtight) food container.

2. Mix in the flour without kneading, using a spoon, 14-cup capacity food processor (with dough hook), or using a heavy-duty stand mixer (again, with dough hook). If you're not using a machine, (like myself), I combined the flour by stirring with a spoon. You may also need to use very wet hands to incorporate the last bit of flour.

3. Cover (without an airtight seal), and allow to rest at room temperature until dough rises and collapses (or flattens on top), approximately 2 hours.

4. After this initial rise, the dough can be used right away. Some prefer to handle the dough when after refrigeration. Refrigerate in a lidded (not airtight) container and use over the next 12 days.

Three Meat Pizza
My own creation, using baking directions from Artisan Bread in 5 as a guide.

About 2-lb of refrigerated pre-mixed dough
3/4 cup Marinara Sauce with ground beef
12 oz. Spicy Italian Chicken Sausage (I used a pack from Trader Joe's that comes with 5)
1 small package of Pepperoni
1/4 lb sliced Mozzarella cheese
1/2 cup grated Parmigiano-Reggiano cheese, (Parmesan, or any other italian cheese blend works well, too)

1. Twenty minutes before baking time, preheat oven with a baking stone at 550 degrees (F). Or Your oven's maximum temp if it doesn't reach 550.

2. Prepare and measure all the toppings in advanced, (slicing sausage, cheese, grating parmesan, and if you're bold cooking vegetables).

3. Dust the surface of the refrigerated dough with flour and cut off a 2-lb piece. Dust the piece with more flour and quickly shape into a ball by stretching the surface of the dough around to the bottom on all four sides, rotating the ball a quarter-turn as you go.

4. Flatten the dough with your hands and a rolling pin on a wooden board to produce a 1/4-in thick round, dust with flour to keep dough from sticking to the rolling pin or the board. Don't overuse flour, consider a dough scraper to "unstick" dough from the board. You may also need to let the partially-rolled dough sit for a few minutes to "relax" to allow further rolling. At this point, stretching by hand may help, followed by additional rolling. Place the rolled-out dough onto a liberally cornmeal covered-pizza peel.

5. Distribute the sauce over the surface of the dough. Do not cover the dough thickly; leave some of the dough surface exposed.


6. Scatter Mozzarella over the surface of the dough, then the Parmigiano-Reggiano cheese, sausage, and pepperoni. No further resting required before baking.


7. Slide the pizza directly onto the stone. Check for doneness in 8-10 minutes; at this time turn the pizza around in the oven if one side is browning faster than the other. It may need up to 5 more minutes in the oven.

Monday, October 25, 2010

Peanut Butter Blondies with Milk Chocolate Frosting

I made these a while back, when looking for a peanut-butter brownie recipe.
People say nothing goes together better than peanut butter and jelly, but I'm going to have to disagree. The union of peanut butter and chocolate is a gift from the gods.

Now, some of my friends, (namely, Ben), are horrified when I tell them that I'm not crazy about chocolate, but when chocolate is paired with peanut butter, I am definitely a fan.

This was my first blondie, and I was very pleased. It was delicious, moist, dense and packed with sweet peanut-butter flavor. Topped with a decent layer of creamy, chocolate frosting, they were absolutely perfect.

Peanut Butter Blondies with Milk Chocolate Frosting

From Joy the Baker

(Makes one dozen big brownies in a 9×13-inch pan)

10 Tablespoons unsalted butter cut into cubes

2 cups brown sugar

1 cup smooth and natural peanut butter

2 large eggs

2 teaspoons vanilla extract

1/2 teaspoon salt

2 cups all-purpose flour

1 teaspoon baking powder

Preheat oven to 325 degrees F. Grease a 9×13-inch pan.

Blondies

In a medium saucepan over medium heat, melt butter and sugar together until the butter is just melted. Remove from heat and allow to cool for 5 minutes. Add peanut butter and stir until incorporated. Allow to cool for 5 minutes more, then whisk in the eggs and vanilla extract. You want the sugar, butter and peanut butter mixture to be cool enough that the eggs won’t begin to cook when they’re added in.

In a separate bowl, whisk together salt, flour and baking powder. Add dry ingredients all at once to the wet ingredients. Stir until just incorporated. Pour the thick batter into the prepared pan and smooth out. Bake for 20-25 minutes, or until a skewer inserted in the center of the blondies comes out clean. Remove from the oven and allow to cool to room temperature before frosting.

Milk Chocolate Frosting

6 Tablespoons unsalted butter, softened

3 Tablespoons unsweetened cocoa powder

1/4 teaspoon salt

1 1/2 – 2 cups powdered sugar

3 Tablespoons milk

3/4 cup semi-sweet chocolate chips, melted

In the bowl of a stand mixer, beat together the butter, cocoa powder and salt. Add 1/2 cup powdered sugar followed by 1 tablespoon milk. Beat well. Add another cup of powdered sugar, followed by 2 tablespoons of milk. Melt chocolate chips in the microwave or in a double boiler. Add melted and slightly cooked chocolate to the sugar mixture and beat to incorporate. Add the final 1/2 cup of powdered sugar if you need a bit more thickness. Spread evenly over peanut butter blondies.


Sunday, October 24, 2010

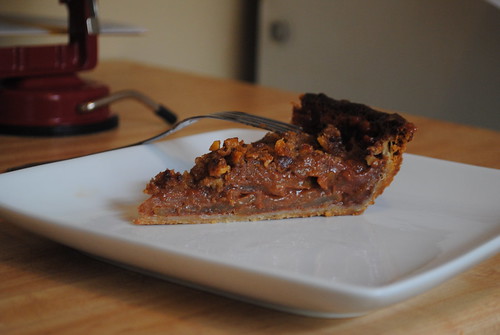
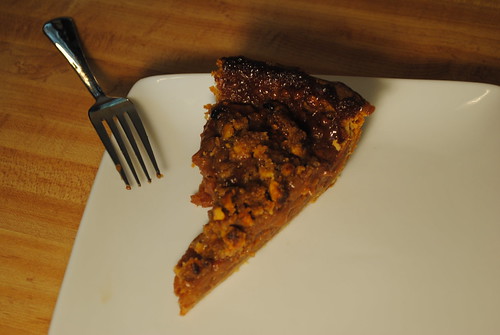
Spiced Caramel Apple Pie

It's definitely fall. In case you didn't notice.

Just to be sure, I went up to Oak Glen with Sam and Ben. Mid-October and Apple season was already well underway. We took advantage of the weather, there was hazy fog, and rain west of the orchards which I think kept people home. There were still plenty of Apple enthusiasts out there, tasting the different varieties.

We stopped at a couple of Orchards and picked 5 different kinds of apples. Tasted some hyped-up apple cider donuts, and took home some cider. It was a great Sunday afternoon.

After doing some research, I found out that the Winesaps and Romes I had picked are good baking apples, so I got to work.


Spiced Caramel Apple Pie
As seen on Beantown Baker. Originally from Rebecca Rather’s “The Pastry Queen"

Make your favorite pie crust and place in a pie plate.
Topping
1/2 cup walnuts
1/3 cup sugar
3 tablespoons brown sugar, packed
1/2 teaspoon ground cinnamon
1/4 teaspoon salt
1/3 cup AP flour
1/3 cup chilled unsalted butter, cut into small pieces

Make the Topping
Preheat the oven to 350 degrees (F). Arrange the walnuts on a baking sheet in a single layer, and toast them in the oven for about 7 minutes, until golden brown and aromatic. Coarsely chop the nuts.

In a food processor, process sugars, cinnamon, salt, and flour for about 1 minute. Add chilled butter; pulse until the mixture is crumbly. Stir in the pecans. Refrigerate the topping, covered until ready to use.


Filling
5 to 6 medium-size apples, such as Winesap
1/2 cup (1 stick) unsalted butter
3 tablespoons ground cinnamon
1 cup sugar
3/4 cup Bourbon, (I used Maker's Mark)
1/2 cup heavy cream

Make the Filling
Increase the oven temperature to 375 degrees (F). Peel, core and cut the apples into 1/4-inch-thick slices. Melt the butter in a large skillet over medium-high heat.

When the butter starts to foam, add the apples and sauté for 5 to 8 minutes.

Meanwhile, in a small bowl, stir together cinnamon and sugar. Sprinkle it on the apples, and reduce the heat under the skillet to medium-low. Simmer the apples for about 1 minute.

Using a slotted spoon, transfer the apples from the skillet to a large baking sheet, and arrange them in a single layer. (The single layer will keep the apples from becoming soggy)

Pour the Bourbon into the butter-sugar mixture in the skillet. Simmer the mixture over medium heat at least 5 minutes, until the alcohol burns off. Add the heavy cream, and continue cooking about 5 to 10 minutes, until the mixture is a thick pourable caramel. Return the apples to the skillet.

Pour the apple filling into the unbaked pie crust, and sprinkle the topping evenly over the apples. Bake for 50 to 60 minutes, (with a baking sheet directly underneath the pie plate to catch any boil over), until the filling is bubbling and the topping is brown.


Garnishes (optional)
Vanilla or cinnamon ice cream
Whipped cream
Caramel sauce

Serve the pie warm or at room temperature with ice cream, whipped cream or caramel sauce.

Friday, September 3, 2010

Chicken Enchiladas


So, my friend asks for some pointers on Enchiladas, and I respond with an overly detailed recipe. Whoops!

What to do? Publish it on the web, of course.

Have some Chicken Enchiladas, tonight! I'm going to. The recipe feeds about 5, but Ben and I will enjoy this for at least 3 meals.

Ingredients
  • 2 boneless skinless chicken breasts
  • about 15 corn tortillas (may be more or less depending on the size of your pan)
  • Salt
  • Pepper
  • 1 Bay Leaf (optional, I've cooked without and didn't notice the difference)
  • 1 large onion
  • 4 cloves of garlic
  • Monterrey Jack cheese, or cheese of choice.
  • 28 oz can of Enchilada sauce of choice (mine is Medium Salsa de Chiles Verdes by Las Palmas)
  • An additional 10 oz can of same sauce (optional*, see note below)
  • Oil that can sustain high heats, (Canola, Grapeseed, etc)

Instructions
  1. Halve the onion, (save the remaining half for filling, later) place it in the pot with 4 crushed cloves of garlic, and the bay leaf.
  2. Season chicken breasts (both sides) with salt and pepper and place in pot with onion and others.
  3. Fill pot with water, enough to cover the ingredients.
  4. Bring water to boil, and simmer for 15 minutes.
  5. Turn over chicken breasts and simmer for another 15 minutes.
  6. Turn off the heat, and if chicken looks ready, (it's ok to cut in to check), remove from pot. Otherwise, let it finish cooking in the residual heat.
  7. Cool chicken until it is easy to handle
  8. Shred chicken to no larger than bite sized pieces

While the chicken is cooking, you can prepare your remaining ingredients:

  • Pre-heat oven to 350 degrees.
  1. Shred your cheese, if it isn't already.
  2. Chop remaining onion, somewhat finely
  3. Pour warmed sauce into a shallow bowl, (I have put mine, bowl and all, in the microwave for over a minute) it should be warm, but not too hot to handle with your hands
  4. In a small shallow pan, pour to 2" high (I hope that's clear)
  5. Prepare pan, (like a 9x13 pyrex), (I can't even remember if I grease mine, but I don't think it would hurt...)
  6. Heat oil to medium-high (Consider asking a 2nd person to help...but I think you said you mastered this on your own, so rock on)
  7. Heat tortillas over the stove (a cast iron skillet is good for this)
  8. One by one, as tortillas are heated, place in hot oil so to lightly fry them. (Stiff enough so they don't fall apart in sauce, but still soft enough to bend easily)
  9. After fried, tortillas go into warm sauce
  10. Once covered in sauce, fill tortilla with chicken, cheese and chopped onions, (ratios aren't specific, but base it on your preferences), and roll together
  11. Rolled enchilada goes straight into pan, using the edges and bottom to keep it shut. Remaining enchiladas will press up against one another to hold each other's shape.
  12. Repeat steps 7-11, (hehehe), until pan is filled to capacity
  13. Pour remaining sauce over the enchiladas, (*sometimes I've felt that the 28oz can is enough, but the leftovers have been drier that I would like. If you like saucy enchiladas, consider the extra 10oz can), sprinkle with cheese.
  14. Heat, uncovered, in oven until cheese is melted and sauce bubbles.

Sweet! Enchiladas are ready.
Invite friends, serve with rice, guac, a corona, whatevs.
Eat and be happy.